| Corker Jaw Replacement |
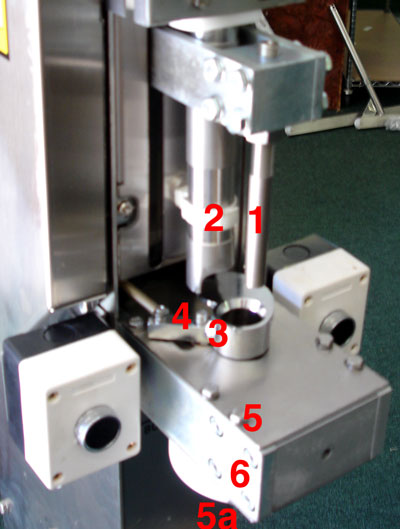
1. Remove Cork Pushing Pin
2. Remove Cork Descent Tube. Unhook Plastic Snapper Clamp. Separate teeth by
pulling VERTICAL. This will avoid stripping the teeth.
3. Remove Cork Pusher by removing the small allen bolt holding the spring. No.
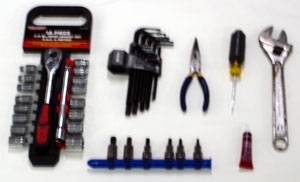
3 metric Allen wrench.
4. Remove the small bolt behind the cork pusher. No. 4 metric allen wrench. (there
is a small bearing on this bolt)
5. Remove Top Plate by removing the 6 Hex head bolts. No. 10 metric socket.
5a. Loosen the hex head bolts holding the bottom plate. DO NOT remove the bottom
plate.
6. Loosen the eight bolts holding the front plate. (4 on each side). Number 6
metric allen socket.
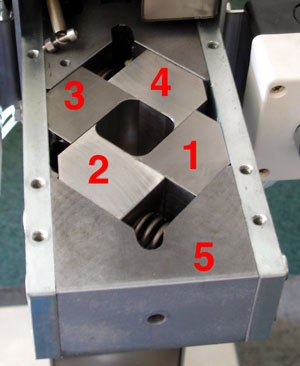
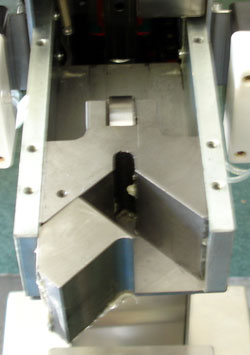
Jaws 1 and 3 are fixed jaws. They are bolted to the front and wedged plates.
Jaws 2 and 4 are held only by the springs.
BE CAREFUL--do not drop the jaws.
Remove the 8 bolts that you loosened earlier and slide the front plate (5) out.
Remove Jaw 2.
Slide the back plate forward and remove Jaw 4.
Use No. 5 metric Allen wrench and remove Jaws 1 and 3.
Replacing the Jaws.
The process is a little different than removal.
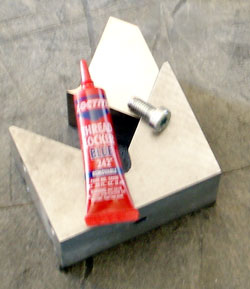
Jaws 1 and 3, the Fixed Jaws are held by a small bolt. Put LockTite on the bolt
and assemble. DO NOT OVERTIGHTEN THE BOLT. THE JAW MUST BE FREE TO TURN WHEN
ASSEMBLED.
Coat all components with grease before reassembling.
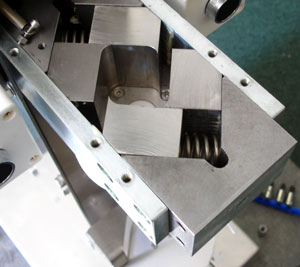
Put the back plate with Jaw 3 in position. Note that the back plate must be positioned
such that the small threaded hole is in back left.
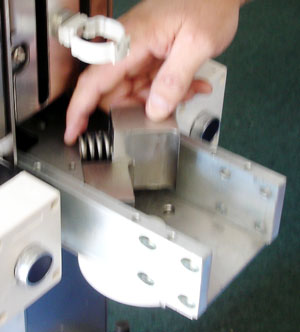
Put spring in Jaw 4. Compress the spring and slide downward into position.
Replace the Front Plate with fixed Jaw 1. Loosely attach the 8 bolts holding
the front plate (4 on each side).
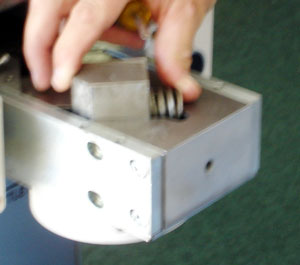
Compress the spring and slide Jaw 2 into position.
Tighten the eight bolts in round robin fashion. Front plate should extend about
2 mm from the side plates.
Tighten the hex head bolts on bottom plate.
Replace top plate and other components. Follow the instructions for positon the
top plate, cork descent tube described above.
Slide the Plastic Clamp teeth together in vertical motion. Use needle nose pliers
to snap tight.
Do not put the Cork Pushing Pin back. After everything is secure, run the machine
a few times to allow the jaws to find relaxed position. Now put the cork pushing
pin in and make check that it moves cleanly as described in the next step.
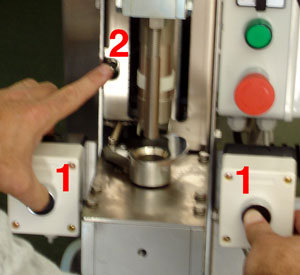
Incremental Movements: BE CAREFUL.
Use the Interlock to Stop the machine quickly. While holding the Start Buttons
(1), depress the Interlock Button 2. Quickly release the Interlock Button to
stop the machine. You can move the machine a little at a time to be sure the
pin slides cleanly into the jaws.